Showing posts with label dessert. Show all posts

Wednesday, February 15, 2012

No Buy Valentine's Day

The universe, or at least American society, conspires against a "no-buy" pledge. The car needed a new drive belt. Otherwise, that's it. I have the same $40 in my wallet today that I had on Feb. 2.

No buy Valentine's Day is actually a breeze, comparatively. I made pie.


I used this recipe for the filling (although I cut the sugar in half), and a standard lard-based crust, using honey liqueur instead of water.

This is also a Dark Days recipe-- the only non-local ingredient was the sugar, which I purchase at a locally-owned mom-and-pop.

Saturday, February 11, 2012

Role reversal

It's been a topsy-turvey winter, and it's a traditional topsy-turvey month, what with it having too few, but still too many days in it and all.

February 29 is even rarer than a blue moon, so on that day, the girl gets to ask the boy out, which is probably why it got the honor. Well, as far as every Sadie Hawkins Dance I've ever heard of, anyway.

Originally, Sadie Hawkins Day was in November, having debuted on November 15. All the sources tell you that Sadie Hawkins Day is NOT February 29, that this is a "common misperception," but it seems to me to be one of those "common misperceptions" that everyone holds, except scholars, your annoying cousin who has to be right about everything, and Sheldon from Big Bang Theory (just speculating). Reading about it has kind of been one of those "I hate Google" experiences.

The Wikipedia article doesn't even acknowledge the concept that it might be associated with Feb. 29, so apparently your  cousin edits the Sadie Hawkins wikipedia page.

So, with all due respect to the mavens, your cousin, and Al Capp:

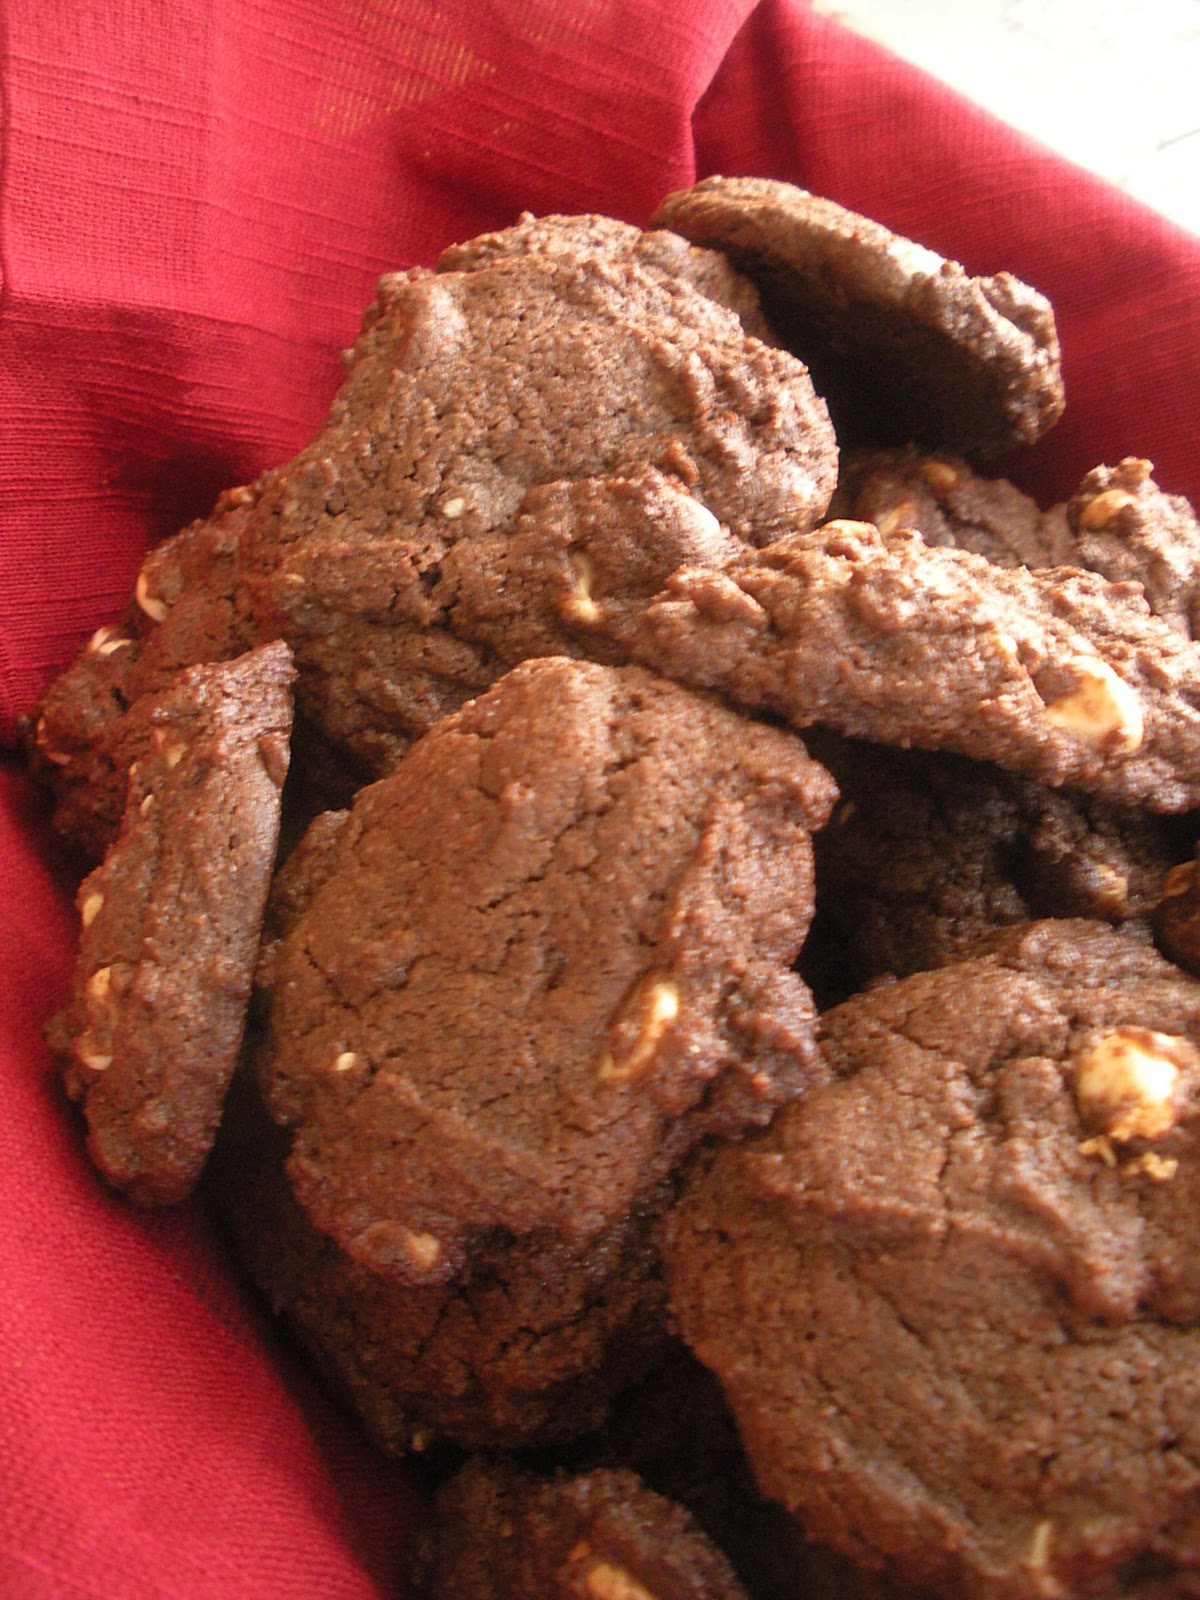
Sadie Hawkins cookies
Use original recipe for toll house cookies, but cut flour to 2 cups, substituing 2/3 cup cocoa powder; substitute white chocolate chips for semi-sweet.

Ladies, use them to invite your sweetheart up to see your etchings (of L'il Abner).

Saturday, January 21, 2012

Baking to share

One of the better side effects of baking is a warm kitchen. Our kitchen is freezing because it (like the rest of our old house) isn't insulated.  Unlike the rest of our old house, however, the kitchen is new(ish) and it's our fault it isn't insulated. The criminal that we hired to do it sold us on the concept that the plastic moisture barrier "has the same R factor as insulation" and we were such idiots we didn't call him on it.

So it's a good idea to bake in the winter--it gets the kitchen nice and warm.

Of course, the downside of baking so much is lots of fattening goodies in the house.  Last week's turtle cupcakes are still calling my name and now there's almost 3 dozen of these tormenting me as well.  I will need to be giving them away, or I'll just sit here eating them, because they're pretty yummy.

Glazed lemon-coriander cookies
1/2 cup butter, softened
1/2 teaspoon salt
1/2 teaspoon baking soda
1 T crushed coriander
zest of one lemon
juice of 1/4 lemon*
2/3 cup honey (or 2/3 cup sugar, which will make a sweeter, heavier cookie)
2/3 cup plain yogurt*
1 large egg
2 cups all-purpose flour
optional: 1/4- 1/3 cup crushed walnuts or pecans (I like the crunch)

Preheat oven to 375F/190C

Cream together first six ingredients. Beat the honey, yogurt and egg, and beat about 1/3 of it into the butter mixture.  Slowly add the flour, alternating with the remaining wet ingredients. Fold in the nuts and drop dough in rounded teaspoons onto a parchment-lined cookie sheet. Bake for 15 minutes, or until edges are golden brown. Makes a soft, cake-y cookie.

Allow to cool completely, then glaze with a lemon glaze:

1T butter, melted
pinch of salt
juice of 1/3 lemon
powdered sugar, enough to make a thick but pourable consistency (about 1/3+ cup)

Drizzle over the cookies and allow to set.

*the recipe I based this on called for buttermilk or sour milk and no lemon juice, just zest. Since I added lemon juice for a lemonier (is that a word?) flavor, I substituted the less-acidic yogurt. Also, I had no buttermilk. If you really want to punch up the lemon flavor, add 1/4 teaspoon of lemon extract, but I think that would overwhelm the delicate coriander flavor.

This is a Dark Days treat-- only the lemon is not local.

Monday, January 9, 2012

Reconstructing a memory

My mother used to make pineapple-apricot pie using whole fruit. Given that this was the 60s and 70s, she probably used canned fruit; I'm pretty sure I never saw a fresh apricot until I was an adult, but still, this was a whole fruit pie.

Mom kept all her recipes in a little wooden box; after she died I always knew the recipes were in there, but didn't have the heart to open the box. Crispy, crumbly cheese crackers; spice cake with caramel icing; pineapple upsdie-down cake. And this pie.

I've written before about opening the box finally, more than a decade after she died, only to discover that the box was empty. Wrenching.

The pineapple pie is one I've always wanted to make, so I started hunting around the web for recipes, and I can't find one that uses whole, let alone fresh, fruit. One calls for dried apricots, another for frozen pineapple concentrate. All use canned fruit in heavy (!) syrup.  So I'm making it up folks. Call it hubris.

Fresh Pineapple-apricot pie
Crust:
2 cup whole wheat pastry flour
1/4 cup finely ground walnuts
2/3 cup shortening (yes, I use lard)
1/2 teaspoon salt
2-3 T apricot liqueur

Filling:
1 fresh pineapple, cut into bite-sized chunks
2-3 T crystal sugar

1 quart halved, pitted whole apricots
1 tablespoon pure vanilla extract
1/3 cup honey
1/4 cup wheat pastry flour
1 T corn starch
1/4 teaspoon salt

1 large egg white, lightly beaten
2 tablespoons cold unsalted butter, cut into small pieces


Preheat oven to 425

Crust:
Toss the ground nuts, flour and salt, cut in the shortening until crumbly. Add the liqueur one tablespoon at a time, and work it in with a fork, using only enough to wet the dough until it sticks together. Divide into two equal pieces and chill. (You can roll them into thick disks first if you like.)

Butter or spray a 9-inch pie plate. Remove half the dough from the refrigerator. Roll it out on a lightly floured surface to form a disc, 1/8-inch thick and 2 inches larger than the pie plate. If it's a weird shape, as mine always is, trim it and puzzle-piece it into a disc, lightly rolling again to make the extra pieces stick.  Use a spatula to help lift the dough and transfer it to the pie plate. Press it lightly in the plate to fit.  Trim, leaving a 1-inch overhang. Place in the refrigerator to keep cold. You'll use the rest of the dough to create a lattice top. Note: the nut crust is not quite as elastic as a traditional flour crust, so you have to handle it very gently.

For the filling, start by draining off some of the juice from the pineapples: macerate the pieces in the sugar for one hour. Because this recipe uses honey instead of sugar to sweeten, there's a lot of liquid, so don't skip this step. Drain and conserve the juice.*

Once you've drained the pineapple, place all fruit in a large bowl. Toss with the vanilla, honey, cornstarch and flour; mix thoroughly.

Lightly brush the bottom crust all over with the lightly whipped egg white; spoon in the filling and dot with butter.

Roll out the remaining dough and cut nto strips 3/4-inch wide to make a lattice cover over the filling. Trim the overhang to 1 inch. Moisten the edges of the crusts where they meet with a little water, then press them together lightly and turn them under. Crimp the edges.

Brush the lattice crust and the rim with the cream. Optional: sprinkle the surface with 2 tablespoons of turbinato sugar.

Bake 15 minutes. Reduce the heat to 375°F and bake until it is golden and the juices are bubbling, about 50 to 60 minutes.  Let the pie cool on a wire rack before serving. 

*Pineapple syrup
Use the rinds and conserved juice to make a simple syrup: Boil the rinds all in 5 cups of water until the fruit starts falling off the rind. Drain and continue to boil, adding juice of 1/2 lemon, and 1 1/2 cups sugar, until volume is reduced to 2 to 3 cups (depending on how syrupy a syrup you want). Drain thoroughly. Keeps about 2 weeks.

Friday, December 30, 2011

Ginger

I had a large piece of ginger left from the ginger pie (with ginger whipped cream*) thatI made for Christmas, so I decided to play around with it and made honey-candied ginger, pickled ginger, crystallized ginger, and ginger syrup (another "waste not" recipe!)

The honey ginger is the winner.

Ginger Syrup
2 cups water
ginger peels from the other recipes
about 2 cups ginger "stock" from making the candy and pickles

1 1/2 cups sugar
juice of 1/4 lemon
lemon zest
pinch of salt

Make 1 more cup of "stock" by boiling the ginger peels in the water; turn heat to simmer and continue to cook until it is reduced by half. Add to the stock from the other recipes. Add the remaining ingredients and heat until the sugar is completely melted. Continue to simmer until the syrup is reduced by a third to half (depending on how thick a syrup you want). You should end up with about 2 cups of syrup.

Use as pancake syrup, or to flavor tea, cocktails, or sparkling water.

*Ginger whipped cream
1 cup heavy cream
2 T powdered sugar
1/2 t vanilla
1/4 cup ginger liqueur

In a small bowl, whip the cream until it starts to thicken. Add the remaining ingredients and continue to beat until stiff, about 3-5 minutes.  For best results, put the bowl and the beaters in the freezer for at least 3 hours before hand.

Tuesday, December 27, 2011

Playing with pie crust

I did a lot of baking this week and didn't want to make a dessert pie, so I made a quiche instead.

 I always avoided pies because I was afraid of the crust. Well, it turns out the crust is the easy part. I make quiche a lot, but only recently started using my own crust once I realized this. Today I added green tea powder and dried mint (about 1/4 teaspoon each) to the flour, and mixed it with some green mint tea still sitting in the pot from this morning.

After a couple of false starts, I seem to have developed a bit of a knack for a tender and flaky crust.  I've been playing around with the basic recipe; here are some of my variations.

Basic pie crust
2 cups flour (I use a wheat pastry flour)
2/3 cup shortening (yes, I've been using lard, from humanely-raised local pigs)
1/4 teaspoon salt
4-6 teaspoons water

Whisk the flour and salt, then cut in the shortening until it's mixed to pea-sized bits. Add the liquid a tablespoonful at a time, mixing it with a fork, and being careful not to overwork any single portion of the the dough. The more you handle it, the tougher it will be. I've found because lard is so moist, I usually need only 3-4 tablespoons of liquid.

Finish the last bit of combining with your hands, divide dough into two equal pieces and flatten into disks. Put one away while you roll out the other, it's easier to handle when it's slightly chilled.

Some variations:

You can alter the flour. I've substituted
1/4 cup oats + 1/4 cup ground walnuts
1/4 rice flour
mixed white and wheat flour
used only whole wheat (nice for a quiche)

I've add the following to the crust (not all at once):
dried orange zest
a tablespoon of raw sugar (this is nice for dessert pies)
various sweet or savory spices including 
ground coriander, pumpkin pie spice, cinnamon, ground clove
green tea powder
dried mint

You can mess with the liquid you use too. I've substituted
tea (including a green mint)
apple cider
orange juice
liqueur

Sunday, October 9, 2011

Cake thief


I went to a wonderful harvest dinner at The Yarden last night. Madam Yarden, aka LaManda Joy, made an amazing feast from the bounty of her gorgeous urban farmette, with two dishes contributed by guests: ratatouille (by yours truly) and Apple Dapple cake, from another friend's mother.

I got the last piece of the cake.

Which turned out to be LaManda's. I ought to say that I feel really guilty about stealing her dessert, when she had just spent the day preparing this amazing feast for us. But it was so delicious I'm having trouble summoning up the shame.

So I made these for her this morning.

Apple dapple blondies

2/3 cup butter, softened
2 cups packed brown sugar
2 eggs
1 tsp vanilla
2 cups all purpose flour
2 tsp baking powder
1/4 tsp salt
1 cup chopped peeled apples
3/4 cup chopped walnuts (i did not add nuts)
1/2 tsp cinnamon (optional)

In a large bowl, using an electric mixer on medium speed, beat butter, brown sugar, eggs and vanilla until thick and smooth, about 3 minutes. Combine flour, baking powder and salt. Add to butter mixture on low speed, mixing until blended. Stir in apples, cinnamon and nuts, mixing well. Spread evenly in greased 9x13 pan.Bake in Preheated oven at 350 degrees until set and golden, 25-30 minutes. Let cool completely in pan on rack.

Sauce:
1 cup packed brown sugar
1/4 cup milk
3/4 cup margarine(1 -1/2 sticks)

Stir together in a medium sauce pan and bring to a gentle boil. Once it starts boiling gently, keep stirring and cook for about three minutes. Remove from heat. Remove hot delicious cake from the oven. Pour over hot cake while cake is still in pan. Let cake cool completely before removing.

Saturday, October 1, 2011

What's a little cold between friends

At the ice rink where I teach, there are two vending machines. One of them is full of candy and dorritos; the other one has what the snack food industry likes to call "healthy snacks"-- things like granola bars, and sun chips, and those "reel froot jelly" things that kids insist isn't candy. I refuse to call it "healthy" food, so I tell the kids that one of the machines has "junk food" and the other one has "snack food."

A fine distinction.

In fact the distinction should not be "healthy" or "snack" or "junk" but simply there is food and then there is that edible stuff that they sell in all the pretty boxes. Why not have a vending machine full of "food"-- yogurt mixed with jam, and only jam. Apples and pears. Nuts. Milk. Raisins. If you have to say "this is healthy food" chances are it isn't food at all because saying "healthy" food is like saying "cold" ice or "metal" steel-- it's simply redundant. Food is healthy. That is its purpose.

It seems appropriate to start October Unprocessed with snack food, since it's snack food where we find the most processing, and the most resistance to the idea that you can snack on something that's not bad for you.

And since it's a balmy 40 out right now, I thought I'd start with ice cream

Autumn ice cream
1 pear, roasted
1/2 cup heavy cream
2 T home-powdered maple sugar
1/2 teaspoon maple extract, if you're cheating on the unprocessed thing

So, powdering your own sugar turns out to be a giant drag when you only have a little coffee grinder to do it in. I put a tablespoon at a time into a standard coffee grinder, and let 'er rip. It's not exactly powdered, but it's very very fine. Mix this, the cream and extract, and stick them in the freezer about 30 minutes (this helps with the aerating process).

Roast the pear at 350 for about 40 minutes, peel the skin off, then grind it in the blender, and put in the fridge until chilled.

When the pear is chilled, start up the ice cream maker (I have a little 2 cup one) and pour in the cream mixture. When it starts to resemble ice cream, add the chilled pear, and aerate until it turns into ice cream.

I tried this with maple syrup for sweetener, but it makes the mixture too watery and it doesn't aerate properly.

Monday, June 13, 2011

Growing project updates

Im participating in three growing projects this year:
Bramki
Lovely plant. Very sturdy; they've doubled in size since I planted them less than a month ago. Bramkis also went to my homeschooling project, a rainbow tomato patch for a friend (a red, a black, a gold, and a green), and the plant sale at Peterson Garden. This and the Ferris have some flowers started, which I've bagged.

Ferris
Again, going strong, nice big sturdy plants. I had only 30% germination on these, so all three that survived went into my garden. Unfortunately, managed to break the central stem on this bagging the first set of flowers. This will weaken the plant, but I guess it just becomes another part of the experiment. There are two additional plants as well.

Blondkopfchen
I have a possibly-bk plant, plus one that I picked up from The Yarden. Per Kelly, I'll save seeds from the Yarden plant for her.

German Pink (One Heirloom)
Planted out the Pink about a week ago, just before the insane heat. It's doubled in size, but unfortunately was not a strong enough, large enough start to really be proof against slugs. Working on some slug barriers for it until it can get bigger. If these folks do this challenge again, I hope they either just distribute seeds, or get it together to have much better or much earlier starts.

Swiss chard
These got a bit drowned by the 6 inches of rain we had in May and none of them came up, along with the other seeds I had in this bed. Think I'm going to need to build a raised bed for this spot next year.

Walnut ginger blondies with chocolate chips
2/3 cup ww pastry flour
2/3 cup finely ground walnuts
1 teaspoon salt
1/4 teaspoon baking soda

1 egg
3/4 honey
1 teaspoon vanilla extract

1/4 cup finely chopped candied ginger
1/2 cup chocolate chips

Preparation:
Preheat oven to 325°.
Mix dry ingredients, including ground walnuts and ginger pieces. In a mixing bowl with hand-held electric mixer on high, beat egg until foamy. Add honey and vanilla; beat well. Stir in flour mixture, then add the chips. Grease an 8x16" pan, spread batter with a spatula. Bake 25 to 30 minutes, or until deep golden brown. Cut into 2-inch bars; cool in pan. Makes 32 walnut bars.

Monday, June 6, 2011

Ordinary


One of the things that the online gardening community did for me, or really for my long-suffering plants, was to save my potted plants. Every year I would watch with resignation and rue as my houseplants slowly died each winter, and the idea of plants in containers outdoors just stumped me.

But with the internet looking over my shoulder I felt both encouraged, and slightly embarrassed at accepting my incompetence in this area. It’s kind of like not minding that you’re a bad housewife until guests are coming over.

Of course, the only thing that houseplants and other potted plants need is care and attention, so once I started paying attention the attrition rate plummeted. I’ve got most of the “houseplants” staged around the pond for the summer, and this year I’ve put 90 petunias in pots on the porch.

I usually have a more exotic mix for my porch; somehow simple flowers in containers seems a waste of resources. But I decided to go for metaphor again with the porch pots. Last year I left them empty so they would “fill with possibilities” and they really did, in the form of clients, the Peterson Garden Project, and lots of new students. However, because I really have enough possibilities for now, I decided I needed to go entirely the opposite direction and do something simple and obvious.

So I planted a crayola box of petunias. Simple, obvious, instantly recognizable with color and bloom that will hit you over the head. There are about 80 on the porch, and the remaining ones tucked into various other pots staged around the garden, including a white one in the dragon’s mouth.

I generally avoid such obvious flowers; I like a subtler ratio of bloom to foliage. But the petunias on the the porch make a joyous statement that sometimes life is good without that much effort and that sometimes the obvious is the thing to do.

Chocolate cream cheese cookies
5 oz semi sweet chocolate, chopped (or 2/3 cups semi sweet chocolate chips)
2 cup all purpose flour
1/3 cup unsweetened cocoa powder (not Dutch processed)
1 1/4 teaspoon baking soda
1/4 teaspoon salt

1/2 cup unsalted butter, room temperature
1/2 cup cream cheese
2/3 cup honey
2 large eggs
1 1/4 teaspoons pure vanilla extract
optional: 1/4 teaspoon mint, orange, or raspberry extract

optional: 1 cup walnuts or pecans, chopped

Preheat oven to 350F/177C . Line two baking sheets with parchment paper.

Melt the chocolate in a stainless steel bowl placed over a saucepan of simmering water. Remove from heat and set aside to cool to room temperature.

In a separate bowl, whisk together the flour, cocoa powder, baking soda, and salt.

Beat the butter, cream cheese and honey until light and fluffy (2-3 minutes). Scrape down the sides of the bowl. Add the melted chocolate and beat until well incorporated. Add the eggs, one at a time, beating well after each addition. Then beat in the vanilla extract. Add the flour in stages, mixing until incorporated. Fold in the the nuts.

Drop in teaspoonfuls onto baking sheet 2" apart (these will spread quite a bit). The cookies are done when they are just barely set in the center. They should still be soft. Remove from oven and let the cookies cool a few minutes on the baking sheet before transferring them to a wire rack to cool.

Makes about 30 large or 40 small cookies.

Friday, April 15, 2011

Baking for a friend

I love doing things for people. This is one of the things that continues to annoy me about my son, who resists having things done for him. My daughter is not so reticent, and is perfectly willing to accept help in cash or in kind.

I started doing things for my young friend Kristen, and lo and behold, she started doing things back (really, I wasn't expecting anything, but in case you need to know, I wear a large and I like the color pink). I've been promising her these brownies for a couple of weeks.

Apricot cornmeal brownies
1/2 cup butter
4 oz unsweetened chocolate
3 eggs at room temp
2-3 T honey
1/2 cup apricot (or other fruit) compote

1/2 tsp baking powder
1/4 tsp salt
2/3 cup white flour
1/2 cup stone-ground cornmeal

Glaze:
1/2 cup apricot compote
1 teaspoon corn syrup
1/2 cup crushed nuts

Melt chocolate with butter with a double boiler or microwave oven, combine with honey and compote and allow to cool. Beat eggs till foamy, then add to chocolate mixture by hand. Sift flour with cornmeal, salt, and baking powder and fold into the chocolate mixture. Before completely mixed, add nuts if wanted. Turn into a greased cake pan.

Heat the compote and corn syrup for the glaze until pourable, then spread over top of brownies. Cover with the the crushed nuts. Bake 20-25 minutes at 350F, until an inserted knife pulls out clean. Cool completely before cutting.

Monday, March 14, 2011

Inexpert

I have not gardened all my life.

I point this out because I just emerged from several lectures by gardeners who all wanted the audience to known that they had gardened all their lives. Gardening lectures and books are full of heart warming stories about gardening with gramps and diggin' fer worms, about earliest memories of harvesting the peas planted with their own grubby, chubby little fingers at the age of 4.

I don't know why garden speakers seem to feel that this is somehow a credential, I mean, I've been banging on things since I was 3, that doesn't make me a drummer. What if lawyers had to have this credential--"I've been trying criminals all my life. Why, I remember researching precedents at granddaddy's firm when I could barely walk."

I find it off-putting. While I understand that the impulse comes from a good place in the heart-- the lifelong love of gardening-- it seems superfluous. Does it really matter that you've always been a gardener? Perhaps it's because everyone really can learn to do this-- since in the not-too-distance past everyone did do this, and in fact everyone learned it from gramps--the largely self-taught experts want to establish their bona fides. The statement of an expert: "I've been doing this my whole life" suggests that if you have not been doing this your whole life, you cannot possibly aspire to the depth of knowledge, not to mention the degree of cool, that the speaker evinces.

Well.

I have not been gardening all my life. My mother was not a gardener. My grandmother was not a gardener. I come from a long line of non-gardeners. I taught myself to garden as an adult. I also went to college as an adult. I learned to drive as an adult (well, if you count 16 as adult). I never had sex until I was an adult. I never had a job until I was an adult. I learned to skate as an adult. I learned Spanish as an adult.

You don't have to have gardened as a child to be a gardener. You don't have to come from a family of gardeners. Your mother needn't be a gardener and grampa doesn't have to own a farm. You can always learn something new, about gardening, or cooking, or anything that interests you. Today, for instance, I learned to make lemon curd from a book. Sorry, grandma, missed that lesson.

Of course, I'm just as guilty of the pointless stories about how I started to garden. I love to tell people how I started, what the first thing was that I grew, how the garden expanded over the years.

But I don't mistake childhood memory for expertise, or nostalgia for knowledge.

Lemon Thumbprint Cookies
1 1/2 sticks butter, room temperature
1 (8 oz) pkg cream cheese, softened
1 1/2 c white sugar
2 eggs
1/3c lemon juice
zest from 2 lemons
3 c flour
1 1/2 t baking powder
1/2 salt

Whisk dry ingredients together, In another bowl cream butter and cream cheese until smooth. Gradually beat in sugar. Add eggs one at a time, beating well after each. Stir in juice and zest. Add the dry ingredients and mix until just combined (over mixing will make this dough tough). Cover and chill until dough is firm.

Preheat oven to 350 degrees F. Roll into balls using about a tablespoon of dough for each. Place on cookie sheet. Make indent with thumb in center of each cookie and fill with lemon curd. (Yes, I'm going to make you make your own. It's easy.)

Bake 12 to 15 minutes or till edges are just turning a light golden brown.

Sunday, March 6, 2011

Does anyone actually follow a recipe?


Or is it just me.

I picked up some cashew butter from the Lehman's Orchard booth in the Marketplace at the Chicago Flower and Garden Show yesterday (along with dried fruits and INCREDIBLY DELICIOUS dried, deep fried green bean crisps. Not kidding. These things are so good we had an 8 year old eating them.)

So this morning I decided to try cashew-butter cookies. I don't like things baked with peanut butter, for some reason, or peanut butter candy. Love peanut sauce, love peanut butter sandwiches. Spoonfuls of plain peanut butter are one of my go-to snacks. But somehow sweetened peanut butter treats make me gag.

So I started hunting around on line for a recipe. Martha Stewart has one. Epicurious has one. All-recipes has one, but all of those use vegetable oil, which just sounded nasty. Orangette did not have one (!) and neither did Coconut and Lime (No way. She steals all my ideas, and then publishes them years before I have them), but Chocolate and Zucchini has a recipe for the cashew butter itself. Most of the recipe I found were for butter cookies with finely ground nuts in them.

So I pulled out my trusty Woman's Home Companion Cook Book and adapted the peanut butter cookies. (I guess that makes this an original recipe.)

And as I was doing this I realized how much cooking "on line" is like cooking with a friend, or trying your mother's old recipe for the first time, solo. You follow the recipe, up to a point, and then realize you don't have some ingredient that's listed, or you never really liked that flavor in there, or that your mother (caution, heresy follows), never really got those noodles right.

So you start to tweak.

And that's what recipes are like on the web. You'll find the same recipe a dozen times (sometimes clearly cut-and-paste; Epicurious recipes in particular show up all over the place), but with a little tweak here and there. Honey instead of sugar, or sugar cut back. More chocolate, less chocolate, more yeast or substitute whole wheat for white flour. The most common phrase on one-off recipe sites is "adapted from Better Known Blog."

Here are my cashew butter cookies with dried cinnamon apple pieces (also from Lehman Orchards). Adapted from the Woman's Home Companion Cookbook.

Cashew-butter cookies with dried fruit
1 cup white flour
1/4 + 3 T cup whole wheat flour
3/4 teaspoon baking soda
1/2 teaspoon baking powder
1/3 teaspoon salt
1/2 cup butter, softened
3/4 cup cashew butter
1 cup granulated sugar + 1 Tablespoon molasses
1 egg, well beaten
1/2 dried apples or other non-acidic fruit, chopped fine (acidic ones like berries will overwhelm the delicate cashew flavor. I also think these would be delicious with white chocolate or caramel chips.)

Preheat oven to 375F/190C. Line a baking sheet with parchment paper.

Combine the dry ingredients with a whisk. Mix the sugar and molasses with a fork until it resembles light brown sugar. Cream shortening and nut butter; slowly beat in the sugar until thoroughly combined. Add the beaten egg. Combine the dry ingredients one third at a time; dough will be very dense and soft. If dough is too crumbly, add a tablespoon of heavy cream or cashew oil. Mix in the dried fruit.

Chill for about 10 minutes, then form into 1-inch balls and flatten with two fingers (sorry, can't use the fork-crisscross, that's for peanut butter!). Bake for 10 to 12 minutes. Makes 3 to 3 1/2 dozen cookies.

You can substitute almond or hazelnut butter, and substitute honey for the sugar. If you use honey, increase the flour by about 1/4 cup and add more fruit, because you'll have a little more dough.

What recipes have you adapted? And how guilty do you feel when the recipe is from your mother?

Monday, February 14, 2011

Valentine's Day

My husband and I have never really "done" Valentine's Day. Sometimes he brings flowers, and occasionally we've gone out for dinner. When I was a working artist I made him a little sculpture or paper piece for Valentine's Day, but I have no idea if he still has them. I don't mind. Neither of us is particularly romantic, although he can be rather sentimental sometimes. And by February 14 we're just on holiday overload because of family circumstances-- Christmas, the New Year, then our anniversary, then my birthday, then Chinese New Year, then HIS birthday, then Valentine's Day, all separated by no more than 10 days at a time. I'm done. But in the spirit of don't buy anything, I felt like I had to create something this year, so I made these chocolate cookies. (He brought the Junior Mints, my favorite candy.) Not that he really eats chocolate all that much. Oh, well. Happy Valentine's Day anyhow, sweetheart (our 36th, which I suppose is the best Valentine's Day gift of all).  

EDIT: two years to the day after I wrote this, he left me for another woman. I just thought it was important to note that. I didn't have a clue.

Sour Cream Chocolate Cookies 1/2 cup butter or margarine, softened 3/4 cup honey 1 egg 1/2 cup sour cream 1 teaspoon vanilla extract 2 cups all-purpose flour 1/2 cup unsweetened cocoa powder 1 teaspoon baking powder 1/2 teaspoon baking soda 1/4 teaspoon salt 1 1/2 cups dried cranberries, plumped Preheat oven to 350 degree F. Cream butter and honey. Beat in egg, sour cream and vanilla. Combine dry ingredients; gradually add to the creamed mixture. Stir in cranberries. Drop by rounded tablespoonfuls 2 in. apart onto greased baking sheets. Bake at 350° for 12 minutes or until set – do not overbake. They should still look kind of moist on top when you take them out. They will set as they cool. Cool for 2 minutes before removing to wire racks to cool completely. Makes about 3 dozen

Thursday, November 25, 2010

Thanksgiving

It’s a long line of 390 American meals, from that first mythical Thanksgiving in 1621 to today. Thanksgiving is our secular Yom Kippur, shared in the Americas by everyone across cultures and religions, no matter where you were born or how you will die, a day of thanks and atonement, when you greet your family with love and food (are they different?) and join to think about what’s good in your life, what’s real, what matters.

Thanksgiving is unique in that it celebrates not military victory, or religious myth, or how our culture and way of life is best, but a simple meal. It’s a holiday not just with food traditions, but, at its heart, about food. With no historical or religious basis other than a meal that someone decided to write about, it is unique in the world as holiday created for and sustained by households, about house holding.

Thanksgiving serves faith over religion, ordinary people rather than heros, and, ironically, production and creation rather than purchase and consumption. It remains unique in American culture as a holiday that has resisted commercialization, if not escaping it entirely. As our media and politics try to rend us into competing tribes, Thanksgiving reminds us how we are alike, and that America is strong because of our e pluribus unum ethos. Sensitized in my lifetime to what Thanksgiving augured for Native peoples, even this tragic history can serve to alert us to our need to come together, even if just once a year, to remember how vulnerable all are to blind faith, unchecked consumption, military overreach, and the worship of heroes over neighbors.

When you emigrate to America you bring your culture with you. But we give you Thanksgiving once you get here, and the gift makes you an American.

I hope you are surrounded today by your loved ones, even the ones that set your teeth on edge the rest of the year. I hope you are sharing the pie from your great-grandmother’s recipe, and the Mexican chutney that your granddaughter found on line. Remember how food and tradition bind us, from the sister of your blood, to the sister of your heart, to the sisters you will never meet, but who connect you nonetheless.


Apple pie with candied wintermelon
Use your favorite apple pie recipe (mine came from my mother's ancient Woman's Home Companion Cook Book). Substitute about 1/3 of the apples with candied wintermelon. Here's how to preserve it:

Preserving wintermelon
(or any firm melon like cantelope or honeydew. This will not work with watermelon)

• Remove the outer green skin of the wintermelon and cut approximately 1 lb winter melon into finger length sticks just like french fries.
• Blanch melon by putting into a pot of fresh water with 1 tsp of baking soda, and bring to a rapid boil for 3 minutes. Transfer the melon to a colander to drain.
• Heat 2 cups of sugar with 1 pint of water in a shallow pan until dissolved. Bring the syrup to the boil. Turn down heat to low.
• Transfer the drained melon to the pot of syrup. Press a plate on top of the melon to immerse the fruit in the syrup. Bring the syrup slowly to a simmer and simmer for 5 to 10 minutes; do not let it boil.
• Take the pan from the heat and allow cooling. Do not drain. Leave it in the syrup for 24 hours whilst leaving the fruit undisturbed. Carefully lift the fruit from the syrup and leave to drain for 30 minutes.
• Transfer the fruit to wax paper or parchment and leave until dry,and store in an airtight container.

Friday, October 8, 2010

The carpenter loved them

I was going to wait for some topic to pontificate on, but these are too good not to share immediately. You can thank "Kiki" for these; she was telling me sad stories and I felt compelled to ply her with sweets.

That's Sherri testing them, all unknowing that I made up the recipe. Fortunately, they're delicious.

So far, no one who's eaten them can believe they have no sugar.

Pumpkin-maple cookies with white chocolate chips

14 T ( 1 3/4 sticks) unsalted butter, softened
3/4 cup maple syrup
1/4 cup molasses
1 large egg plus 1 egg yoke
1 teaspoon vanilla extract
1 cup pumpkin puree
3 cups all-purpose flour
2 teaspoons baking soda
1/2 teaspoon salt
1 teaspoon ground cinnamon
1/2 teaspoon ground ginger
1/4 teaspoon grated nutmeg
1/4 teaspoon ground cloves
10 oz. bag white chocolate chips (Sun Spire makes an all-natural one)

Heat the oven to 350F/175C. Line acookie sheet with parchment paper.

Beat the butter until smooth, then beat in the syrup and molasses, a little at a time. Beat the eggs then add to mixture, one half at a time. Mix in the vanilla and pumpkin puree. In a separate bowl, whisk together the flour, baking soda, salt, cinnamon, ginger, nutmeg (if you grate your own, this is about 1/3 of a nut), and cloves. Slowly beat the flour mixture into the batter in thirds. Stir in the chips. Scoop the cookie dough by heaping teaspoons onto the prepared cookie sheet and bake for 15 to 20 minutes, or until the cookies are browned around the edges. Cool on wire racks.

For an alternate, less sweet taste, and a truly sugar-free snack, substitute dried apples or pears for the chips.

Unprocessed readers: All spices also purchased whole and ground by me. To grind your own spices, you can use that old coffee grinder that's hiding away somewhere from your hipster days. To clean it, run some white rice through it after each spice, then wipe down with a rag. See, a use for the white rice you're not eating this month!

Makes about 4 dozen 2" cookies.

Wednesday, September 29, 2010

What's a heaven for?


To play on the aphorism-- a gardener's harvest should exceed her shelf space, or what's a basement for?

I have upwards of 30 pounds of winter melon that needs to be preserved. No matter how long it will keep in the shell, once I cut one I have to preserve it, because each one is way too big for two people to consume in a single meal, even with leftovers. Here's the first of a whole bunch of winter melon recipes:

Candied Winter Melon
5 pound winter melon
3 cups sugar
juice of two lemons
Remove the outer green skin of the winter melon and cut into finger length sticks just like french fries.

Blanch melon fingers by putting into a pot of fresh water with 1 tsp of baking soda, and bring to a rapid boil for 3 minutes. Transfer the melon to a colander to drain.

Heat the sugar and lemon juice in 1 1/4 quarts of water in a shallow pan until dissolved. Bring the syrup to the boil. Turn down heat to low. Transfer the drained melon to the pot of syrup. Make sure to completely immerse the fruit in the syrup. Bring the syrup slowly to a simmer and simmer for 5 to 10 minutes; do not let it boil.

At this point you have two options- store in the syrup, using heat canning, or drain and dry. For heat canning, transfer the hot syrup and melon into heated jars and follow standard procedure for heat canning. For drying, allow fruit to cool to room temperature. Do not drain. Leave it in the syrup for 24 hours whilst leaving the fruit undisturbed. Then, carefully lift the fruit from the syrup and leave to drain for 30 minutes. Transfer melons to wax paper or parchment and leave until dry, then store in an airtight container.

Thursday, August 26, 2010

An act of courage, and the hand of the divine


Sometimes the most mundane activity inspires the most profound thoughts. After gathering the morning’s harvest, I set about dicing the six cucumbers to freeze (fresh cucumber soup in January!), nibbling as I cut, as one does. I slipped a sweet piece of pale green crunch into my mouth and experienced the most revelatory moment:

I made this

I made a cucumber. I also "make" tomatoes, eggplants, squash, corn. Beans. Beets. Carrots. In fact, I can make anything, with help from God and the goddess. A garden brings the divine into the kitchen, through each small miracle of a fruit.

Urban Americans are so disconnected from food origins, and so indoctrinated to rely on someone else's expertise, that it takes both imagination and a profound act of courage to eat something that no one has inspected, or vetted, or processed, or labeled, or packaged. In our culture every single piece of fruit has a label and a number. Small storefront grocery stores are mistrusted if not demonized, let alone the guy selling watermelons off the back of his truck. Children ask “what is it” when confronted with a cherry tomato on the vine, and have never snipped the ends off a bean. Eating something that only you and God have touched is nearly revolutionary if not actively subversive.

I learned today that in the UK, everyone is entitled to an allotment, because “landless citizens have a right to the commons.” Here in the states we’ve let cities like Detroit and New Orleans die, because god forbid someone should use someone else’s land (i.e. vacant, abandoned lot) to grow their own food. God forbid the government should be required to redeem land that they allowed private companies to contaminate, so that no one can use it to grow things on, while allowing agribusiness to drench our inspected, vetted, processed, labeled, packaged foods with poison.

This week, we've been subjected to a report about poisoned eggs. Eggs that have been bleached, irradiated, scrubbed, and in fact, vetted, processed and labeled, have supposedly sickened more than a thousand people. We took "baby's first perfect food" and turned it into poison. I don't have to worry about it. I get my eggs from a local farmer, who neither poisons, nor cannibalizes, nor confines her chickens, and whom I've met.

And I grew a cucumber, a carrot, a tomato, a bean. I ate it hot from the sun—God’s hand to my mouth.

Cucumber-raisin bread
Adapted from simplebites.net "Best Zucchini Bread Ever"

1 1/2 cups whole-wheat flour
1 1/2 cups cake flour (or all-purpose)
2 teaspoons cinnamon (freshly ground, if you're into it)
1/4 teaspoon nutmeg (again, freshly grated, assuming you have, um, nutmegs? around)
1 teaspoon baking soda
1 teaspoon baking powder (make your own!)
1/2 teaspoon salt

2 eggs, room temperature
1/3 cup canola or nut oil
3/4 cup plain yogurt
1/3 cup buttermilk (or regular milk with a splash of vinegar)
1 cup organic Turbinado sugar (or brown sugar, firmly packed)
2 teaspoons pure vanilla extract
2 cups finely grated cucumber
4 oz raisins, plumped

Preheat oven to 350F.

Oil a 9×4 inch loaf pan and line with parchment paper. Line a 6-cup muffin tin with papers OR oil a mini loaf pan. Whisk dry ingredients and set aside. In a large bowl, beat eggs until foamy, then beat in yogurt, buttermilk, oil, sugar, and vanilla and combine well. Stir in grated cucumber and plumped raisins. Fold flour mixture into the wet ingredients and stir until combined. Spoon batter into 6 muffin cups (or mini loaf pan) and pour the rest into the 9×4 loaf pan. Bake for approximately 50 minutes. Remove from oven and cool 10 minutes in the pan.

Loosen the sides and remove from pan. Cool loaf completely before cutting.

Thursday, July 22, 2010

What I need to get through the winter

In which I pretend to be Barbara Kingsolver.

Do you think about what you eat? Or do you go to the grocery store and grab stuff off the shelf? Do you know how much food you consume? When you start thinking about growing it yourself, you need to start thinking about "how much."

I started out with the idea that the kids should know where food comes from. So I planted tomatoes. A friend gave me some raspberry canes (the first edible I ever grew). Then peppers. Then beans, onions, carrots. Then I started thinking--I wonder if I can get through a summer without buying any produce (yes). Then it became-- how long into the the autumn can I stay out of the produce aisle? (a long time). Here's where I've gotten to this year:

Fruit syrup (for treats and drinks)
• Current use: about 1 wine-bottle full every 10 days
• Fresh fruit needed per bottle: 1 pint
• # days from last summer fruit harvest to first summer fruit harvest: 270

I need to freeze 27 pints of fruit. Since I don’t grow more berries than we consume, this can all come from the farmers market. I’ve currently been buying 2 to freeze for every one we consume each week.

Tomatoes
• Current use: One whole tomato and one tomato sauce dish per week
• Fresh fruit needed per: 6-8 tomatoes per quart of sauce or pint of paste, plus some just peeled and frozen whole
• weeks from harvest end to harvest start: 40
• fruits per plant, 10-20; need 30+ plants. I don’t have it, only have 10, plus 5 cherries, giving me a maximum yield of 200 (more likely 100+), so I can do at most 15+ quarts of sauce/whole/paste in some combination (probably do paste, since it takes up less room, in smaller jars) I can also stretch this by making as much of the summer’s meals as possible from the cherry varieties.

Winter Squash family
• Current use: 1-4 dishes per week (stews, casseroles, soup, baked goods)
• Fresh fruit needed per: one squash or pumpkin can yield 2-3 meals/uses pulped.
• # weeks from harvest end to harvest start (zucchini) 34

I need 68-130 meals, or 40+ fruits. I have 9 vines, so this is actually doable, betw root-cellar type storage and frozen pulp. Amazing.

Corn, peas, beans, other “side” veggies
• Current use: 2 cups per day
• # days from harvest end to harvest start: 200
Beans a dead loss, won’t get more than we consume immediately (thank you evil furfaces); I have 80 corn stalks, which might yield 2-6 ears per stalk. Gonna need to learn how to preserve corn, because this is also doable.

Roots
• Current use: 2+ lbs per week (3 to 7 items per lb, carrots, turnips, parsnips, beets. I don’t grow potatoes)
• # weeks from harvest end to harvest start (including overwintered): 24
• need 100-400 items. Again, a possible winner. I have 80 parsnips, 200 turnips, 40 beets, countless carrots.

Misc.
pesto, eggplant
• Current use: 1 meal per week
• Fresh needed per: 1 quart of whatever I preserve
• # weeks from harvest end to harvest start: 38
• I have enough parsley and basil to preserve several quarts of pesto (in addition to preserving for use as flavoring); eggplants still up in the air (no fruit yet :(, but there are 12 flowers on four plants, which if they all fruit is 12 quarts of baba ganoush, or peeled, blanched frozen ep slices)

While you gear up for preserving, here's a treat to make with the wonderful apricots available for another couple of weeks.

Apricot-honey cookies

3 eggs
2 teaspoons baking soda
4 1/2 cups all-purpose flour
1 cup honey
1 cup apricot compote (thin apricot jam. or any thin jam)
1/2 cup milk
1 teaspoon orange extract (for apricot. Try different extracts with different fruits)

Preheat oven to 350 degrees F (175 degrees C).

Beat eggs well. Dissolve baking soda with a little milk. Mix together the rest of the ingredients to make a soft dough. Spoon onto a parchment-paper covered baking sheet in teaspoonsful. Bake for 8 to 10 minutes. DO NOT OVER BAKE.

Saturday, April 10, 2010

I've made my bed, now I'll grow in it

The end goal, I suppose, is getting rid of the last of the grass, although my husband says it creates "negative space" as well as giving the eye a rest from the relative chaos of the flower and vegetable beds. But pretty much every year I manage to sacrifice another patch of grass.

Last year I added an ornamental bed, ambitiously called the Woodland, which was supposed to be smallish trees, shrubs and an understory. But after I put it in I started realize it would cost me too much sun on the adjacent vegetable beds, so now it's more of a prairie and vegetable overflow patch.

This year, I extended the main vegetable bed, so I would have another sunny patch for tomatoes, and also to aid in crop rotation. My whole yard is only 23 x 60, with about 1/4 of it planted in veggies, maybe a total of 400 square feet of vegetables in all.

Digging through sod is a terrible way to spend a weekend, so I generally kill the grass first. For flower beds I use a thick layer of wood or bark mulch, but the wood takes too long to break down for a vegetable bed, so this year I dragged some old area rugs out of the basement (first picture, left) and put them out in the approximate shape of the bed in March, then left them there for 5 weeks. They killed the grass beautifully (pictured, below right); it took maybe 10 minutes to cut the soil into 1 foot squares, which we then simply turned over. This will compost, mostly, in the 7 or so weeks until I need to plant things in this bed. I'll just need to spade and hoe it.
No clever connection to today's recipe (maybe chocolate cookies same color as healthy dirt?), just some really delicious cookies.

Chocolate cayenne cookies
• 2 1/4 cups all-purpose flour
• 1 teaspoon baking soda
• 1 teaspoon salt
• 1/2 teaspoon cayenne

• 1 cup butter (no substitutes), softened
• 2 cups sugar
• 2 eggs
• 4 (1 ounce) squares unsweetened chocolate, melted and cooled/ or ¾ cup cocoa + 4 T butter
• 2 teaspoons vanilla extract

In a large mixing bowl, cream butter and sugar. Add eggs, one at a time, beating well after each addition. Beat in chocolate and vanilla. Combine the flour, baking soda, salt and cayenne; gradually add to the creamed mixture. Drop by tablespoonfuls 2 in. apart onto ungreased baking sheets. Bake at 375 degrees F for 10-12 minutes or until tops are cracked. Remove to wire racks to cool.

These are so delicious with milk that they really should be illegal.