Thursday, April 29, 2010

Hipster Supported Agriculture


I'm taking part in the Kinder Gardens challenge by inviting, not children, but my twenty-something friends to come garden and cook with me. The deal is, they come once or many times, and I share the bounty from the garden and the kitchen with them. Had a wonderful first day, with a parade of visitors through my garden on cool and sunny Monday.

First to come by were my skating student Katie and her mother Trish, who like to garden but always complain about living in a condo. Then it comes out that they have a 17-foot wide balcony (didn’t ask if it gets sun). Trish said they grew cauliflower in a big plastic bin last year, so I’ll see if I can pass on some tomato seedlings for them to try. They helped me plant out the chard, dill and broccoli, and I showed Katie how to plant broccoli seeds with a radish; the radishes come up fast and mark the row, then you pull them just about the time the broccoli starts to take off. Unfortunately, I meant to plant the early sprouting purple, and handed her the Pinetree mix by mistake. Oh well. We put in more than 100 chard sprouts, so when they get to size, Katie and Trish get their first "HSA share" for their help with planting them.

Right after Katie left, a gardening buddy from MyFolia.com (another Katy) came by and I sent her home with borage volunteers and chamomile sprouts, a tiny raspberry cane, some lily of the valley and some dwarf iris. We looked for some of the things I need to divide that I can donate to her later in the summer as well (she’s trying to put in a free garden; since that’s how I put my garden in, I’m paying it forward here). She’s going to bring me some parsley in trade.

Second Katy left, and my friend Dee stopped by with her nanny charges, 2-year twins. We thought about gardening with them, but they weren’t crazy about dirt. (Who ever heard of two-year olds who don't like dirt?) They did however really like the flowers and the colors. Once we managed to convince them that picking flowers is okay, I sent them home with violet-tulip-grape hyacinth bouquets wilting in their hot little hands. I pity the next garden they see, because they now know “picking flowers is okay.” Well, it is in my yard.

After they left, I finished the garden tasks for the day: putting in several rows of carrots, planting out the nasturtiums and the second snow pea planting.

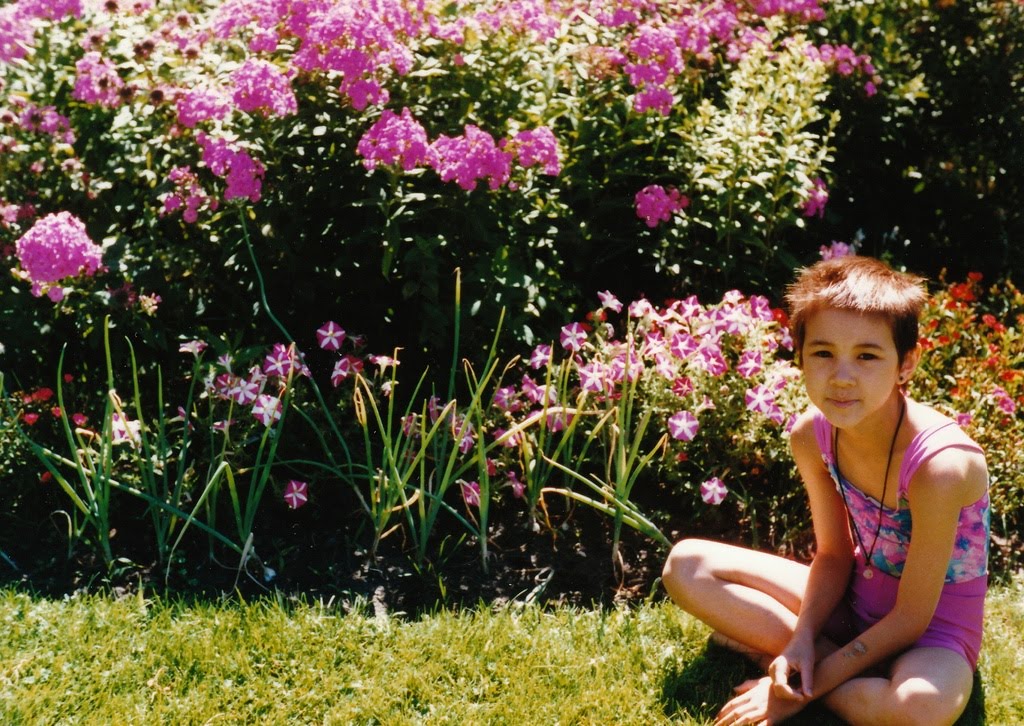
There was one more 20something to collect: at the end of the day, we went to the airport to gather my daughter, who had been on tour since August. What a perfect day.

Apple-spinach slaw with honey remoulade
3 medium apples, sliced very thin, mixed with a little lemon juice to preserve color
small red pepper, sliced very thin
10-12 oz spinach, blanched and sliced (reserve some of the water)

Dressing:
3 T mayonaisse
1 T honey
1/2 teaspoon lemon or lime juice

Toss the apples and vegetables together. Whip the dressing, using a little of the spinach water to thin it if necessary. Toss and chill for one hour.

I served it as a slaw with crab cakes, but it's delicious on its own as well (in fact, I'm eating it right now!)

Thursday, April 22, 2010

We threw out the baby

I went to grade school in the 60s, which meant the boys took shop and the girls took home ec. We wore skirts to school, and boys had to have their shirts tucked in. We learned ballroom dance and always wore white gloves when we dressed up. Shop meant that the boys learned how to change the oil in a car, basic carpentry like use of a band saw and a table saw, simple construction (bird house), and how to wire a lamp.

The girls made a sewing sampler, and a couple of simple garments both by hand and machine; we learned how to set a table, talk to the servants (this was Philadelphia's Main Line after all), arrange a luncheon, and meals from simple- chicken soup- to complex- a souffle. We learned how to write a household budget and how to balance a check book.

Unfortunately, when women developed consciousness in the late 60s and early 70s, all the "girl" stuff got thrown away. It wasn't valued. The boy things we kept-- now everyone took shop, and no one took home ec. Message received-- things that boys do are good, and things that girls do are bad. Baby, meet bath water. Someday we'll maybe manage a society where every contribution is valued, whether it's done traditionally--girls in the house, boys in the world--or new age, where you work where your talent and your inclination leads you.

I remember Home Ec very clearly-- how to make chicken broth, how to use a percolator (this was decades before Mr. Coffee). We made salad dressing--everyone did in those days. There was no such thing as off-the-shelf salad dressing. We made souffle, at the age of 12, and omelettes.

When you teach children to cook at school, you remove the emotional content and it becomes a normal thing that people do. Especially now, when so many mothers don't cook from scratch anymore, cooking at home, especially for tweens and teens, becomes fraught with political correctness, or parental weirdness. Teach the kids to cook at school--boys and girls--and it moves into the background noise of Things We Should Know.

The first thing we made, on the first day of Home Ec, was cinnamon toast. Seems silly, doesn't it? But how many people reading this blog buy their cinnamon sugar already mixed? That is what seems silly now. Buy your cinnamon from a reliable spice shop, and put as much or as little real cane sugar into yourself. Cheaper, more reliable, no fillers, and custom made for your preference.

Other than that, I remember this cinnamon toast as being the best cinnamon toast I ever made before or since. I don't recall any more how they did it, except that it was toasted in the broiler, not a toaster, and it was bubbly and crisp and exquisitely delicious. Here's my attempt to duplicate it here, on my own homemade wheat bread.

Whole wheat bread
from the American Home All-purpose Cook Book

1 3/4 c. milk
1 T. sugar
1 T. sea salt
1/4 c. honey
2 T butter or shortening
Yeast-- 2 cakes compressed, 2 pkgs active dry, or 2 tsp bread machine yeast
1/2 c. warm water (105-115F)
4 c. whole wheat flour
2-2 1/2 c. white flour

Combine milk, sugar, honey and shortening in a saucepan and heat until bubble appear around the edge and butter is melted; cool to lukewarm. If you are using active yeast, at this point crumble it into the warm water in a large mixing bowl and stir to dissolve, then add the lukewarm milk mixture. For bread machine yeast, add the yeast to the flour or to the milk mixture.

Stir in the whole wheat flour until completely moist. Add 2 cups of the white flour, work in well. If needed, add enough additional flour to make a stiff dough. Turn out onto a floured board and knead about 5 minutes, or until dough is smooth and elastic. It will not feel as smooth as white bread doughs.

Grease a large bowl, and place the dough in it, rotating the dough a couple of times to make sure it is coated with oil. Cover with a damp towel and let it rise in a warm place for about 1 1/2 hours, til doubled in size. Punch down, let rise another 30 minutes or until almost double. Grease two 9" loaf pans. Punch dough down, knead briefly to pop any air bubbles, divide in half. Shape each piece into a loaf and place in pans. Cover.

Let rise 50 to 60 minutes or until doubled. Bake at 375F for 25 to 30 minutes.

Cinnamon toast
2 T softened butter
2 tsp cinnamon sugar (about 3:1 ratio cinnamon to sugar. Add a little clove or a tiny pinch of cayenne for a kick.)
2 slices of bread

Mix the cinnamon sugar into the softened butter, spread on the untoasted bread. Place cinnamon-side up on a cookie sheet or a broiler pan, place in broiler and cook at broil heat until butter is bubbling and edges are lightly toasted.

Monday, April 19, 2010

Talking to the butcher

After years of buying my meat from the last local butcher in Chicago (well, not quite, there are lots of carnicerias in my neighborhood, my Spanish just isn't good enough), I switched to the mail-order meat from freshpicks.com for the past couple of months.

I can't tell you how guilty I felt about this, because I basically abandoned a local, multiple-generation, family-owned business that I feel very strongly about supporting. He knows me by name. I know when his daughter got married, and his grandchildren's ages. He remembers where my kids are traveling. It finally occurred to me, duh, to switch all my paper goods and cleaning supply purchases to him; I'm not even sure why I wasn't buying these things from him anyway.

Today I went in for the first time in nearly three months. Of course, being a neighborhood butcher, he immediately wanted to know where I'd been, and how the kids were. So I took a deep breath and fessed up. "I stopped buying from you because I don't know where your meat comes from, or what's in it."

And I got an education.

He knows where his chickens come from, because they come from a local, sustainable farm. He can do this because his customers seem to tolerate the slightly higher price of these birds. But pork and beef are too expensive to buy from known provenance; in fact, as he explained, it's impossible for him to know the original farm source of his beef and pork. He buys from an abattoire that doesn't give that information. This was new information-- that butchers don't necessarily know the source of their meat because of the way the slaughtering industry is set up. It makes me admire the effort that has gone into setting up this alternative slaughterhouse system that tracks the meat back to its farm source. I just never thought about it before, which I suppose is the entire problem with our food system. No one thinks about it.

I will tell you, if you're lucky enough to be able to have this conversation with your butcher, he will look at you like you're crazy. I hope more people do this, so maybe these small stores will start buying meat from certified organic/sustainable slaughterhouses.

I'm going to switch my chicken purchases, and special-order meats for holidays back to Don down the block. I'll buy my dry goods and paper products from him. Supporting locally owned businesses is part of the new web we're trying to create, after all.

Shredded Chicken and Pearl Barley with spring vegetables
via MoreMarin.com

• 2 tablespoons extra virgin olive oil
• 1 large yellow onion, diced
• 4-5 celery stalks, with leaves, diced
• 5 large garlic cloves, finely minced
• 2-3 large carrots, peeled and diced
• 1 medium sweet potato, diced (I used apples, having no sweet potatoes at hand)
• 2 tablespoons dried thyme
• 1 tablespoon dried sage
• 1 tablespoon dried rosemary
• 1 tablespoon dried fennel
• 1 cup pearl barley
• 32 oz. chicken or vegetable broth or stock
• 2 1/2 cups cooked, shredded organic chicken breast
• 2-3 cups peas (didn't have any-- I used swiss chard)
• sea salt and freshly cracked black pepper, to taste

*Note- this dish is so versatile. Any combination of vegetables and spices may be used. Tofu may also be substituted for the chicken, if desired.

The moreeats.com recipe didn't say how the chicken got cooked, so I've added that step.

Preparation
In a large stock pot over medium heat add the olive oil until shimmering but not smoking. Brown the chicken (cook on each side until the skin "releases" the pan; about 5 minutes per side).

Add the onion and celery and cook, stirring occasionally, until the onion is translucent - about 5 minutes. Add the garlic, carrots and sweet potatoes and cook for about 5-6 minutes, stirring occasionally. Add the thyme, sage, rosemary, fennel and barley and cook for 2-3 minutes. Add broth/stock and stir to incorporate. Bring to a boil and reduce to low heat to simmer. Cover and let cook for 20-25 minutes or until liquid is reduced and barley is cooked through.

Add chicken if using pre-cooked, otherwise remove the chicken, allow to cool then debone and shred it (make stock for a future meal with the bones and skin). Put it back in the pot with the peas or other greens, sea salt and pepper and stir to combine. Cook for another 5 minutes. Remove from heat and re-season if necessary.

Saturday, April 17, 2010

Join Hipster Supported Agriculture

We often see and talk about getting kids to garden. From Alice Water's take over of the Berkeley Public School System, to school gardens all over the place; from Michelle Obama's White House garden to the new Kinder Gardens project at the Inadvertent Farmer.

But there's a missing generation here, of urban and suburban young people whose parents didn't garden, but who are entering adulthood with an urgent need to have this skill.

I decided the Kinder Gardens project needs a companion project for young adults-- why wait 20 years for the newest generation to have gardens of their own, when there's an entire cadre of cynical Millennials who need to get their faces in the sun and their hands in the earth. (That's a couple of them enjoying the garden without doing any work.)

Despite our large sunny yard in the middle of Illinois farm country, my own mother never gardened. With the exception of an uncle who owned a Christmas tree farm, in fact, I come from five, yes five, generations of urban dwellers, as does my husband. We are that rare family with no farmers in our ancestry well past living memory. When I started gardening, I did it all from books and trial-and-error. I had no mentors, and started gardening when the internet was still Al Gore's wet dream and social media wasn't even a twinkle in his eye.

So, introducing the HSA-- Hipster Supported Agriculture (thanks to IceMom for the naming idea).

I've begun inviting my twenty-something friends, plus my own kids, and their friends, to come garden with me one or two days a month-- if there are no garden tasks, or the weather is against us, I'll bring them into the kitchen and we'll cook something. In exchange for the labor, and the companionship, I'll send them home with fresh produce or baked goods.

Update: HSA Schedule
Today (4/18): bed prep and bread making
April 26: snow pea 2nd planting, plant out dill
April 30: greens and roots,
May 14- cucurbits, if warm enough, beans
May 30- plant out ornamentals
June 6- solanums, herbs
mid June, TBD- first harvest (snow peas, lettuce, chard, spinach, radishes)
June 27- garden maintenance, harvest

Cooking days: May 2, May 16, June 13, June 27

I hope we can make things like this, my first garden meal of the year:

Pasta in mushroom sauce with winter turnips and new greens
1 pound turnips, diced, plus their greens
8 oz. fresh spinach
8 oz. mushrooms
1 cup half and half, plus 1 cup vegetable stock (for vegan, use vegetable stock only)
1 teaspoon lemon juice
2 T butter (for vegan, use a light oil, like safflower or canola)
parsley, salt, white pepper
your pasta of choice (1.5 cups dry for each diner)

Start the water for the pasta, when it boils use it to lightly blanche the turnips (about 5 minutes, until just soft--they'll cook the rest of the way with the sauce) then the greens (2 minutes). DO NOT DUMP THE WATER. You're going to cook the pasta in it. Scoop out the veggies and set them aside. Keep the water at a light simmer for now, you'll put the pasta in presently.

Slice and saute the mushrooms in the butter until all the butter is absorbed. Then add the lemon juice and saute until the mushrooms release their moisture. Add the parsley, salt and pepper and saute for another minute or so. Add a little more butter/oil if it starts to dry out. Add the cream and reduce it to a thick sauce (about 5 minutes), then add the stock and the veggies. Continue adding stock to keep the sauce at a consistency that you like.

Cook the pasta, spoon it up.

Thursday, April 15, 2010

Bonding over the compost


There's a new blogger project on gardening with your kids called "Kinder Gardens- Let's Get'em Dirty!" that makes me wish I still had some child victims of my own around to dig in the dirt with me. (The one in the picture turned 21 on Wednesday.)

I've spoken a lot recently with my kids about what they remember about the garden growing up. Surprisingly, they don't remember how much they loved sticking seeds in the dirt, or picking up worms, although my daughter did recall that she liked planting out potted plants. Mostly what they remember, as I wrote about in a prior post is the "forced labor." Although, to be fair, they also both remembered and miss the delicious fresh veggies.

They also have all bonded with their peers over their hatred of feeding the compost, which I find absolutely hilarious, and charming.

Gardening with kids is lots of fun-- you have to let go a little bit, because things get trampled, and planted wrong, and picked early, but that's part of the entertainment.

In this stage of my life, between generations as it were, I pretty much garden alone, but it's made me think about how to get my young adults involved in the garden again. I'd love for them to see it as bonding with the goddess, and with me, and bring them back in for the joy of it.

I could try bribing them with food I suppose, but here's the question: How do you get apartment-dwelling, time-crunched young adults back into the garden?

Ginger carrot scones
from myrecipes.com more or less

3/4 cup all-purpose flour plus 3/4 cup whole wheat flour
3/4 cup old-fashioned oats
1 tablespoon baking powder
1/2 teaspoon salt
1 1/2 teaspoons orange zest
>1/3 cup sugar or substitute 1/4 c honey
1/2 cup cold butter, cut into small pieces
1 cup finely grated carrot (about 1 1/2 carrots)
2 tablespoons diced crystallized ginger or 1 teaspoon ground ginger
1 large egg
1/2 cup plus 1 tablespoon buttermilk (if using honey, reduce to 1/3 cup buttermilk or sour cream)
1 teaspoon vanilla extract

Preheat oven to 425°.

Mix together first 5 ingredients and 1/3 cup sugar. Cut in cold butter until mixture resembles coarse meal. Add carrot and ginger and mix until just blended. Whisk together egg, buttermilk, and vanilla in a separate bowl until blended. Add to flour mixture, and mix just until blended and slightly moist. (Dough will be sticky.)

Spoon in large tablespoonsful onto a lightly greased baking sheet (or line a sheet with parchment paper). Bake at 425° for 15 minutes or until golden.

Tuesday, April 13, 2010

The empty nest

I'm trying to plan menus two weeks out, because of buying groceries online--order on Tuesday for delivery Friday. Instead of planning this week, or the next few days, and then walking through the garden, or dropping in to the market, I have to jump ahead 5 to 10 days and think of what I will need.

Next week my daughter will be here for about 10 days, and I can't remember what she eats. Cheese, and bread. Cold cuts? She's a carnivore, but I don't really want to add much meat to the diet. I need to make bread. Rice pilaf, and all the family favorites I suppose, since she eats almost exclusively packaged pre-made foods and restaurant fare on the road.

Perhaps she'll like the homemade pita.

My own pita recipe
• 2 cups white flour
• 1 cup wheat flour
• 1 1/2 teaspoons salt
• 1 packet yeast (or, if from bulk, 2 teaspoons yeast)
• 1 teaspoon mahlepe
• 2 Tablespoons honey
• ½ cup sour cream or Greek yogurt
• 1 to 1 ¼ cups water, roughly at room temperature
• 2 tablespoons olive oil

If you are using active dry yeast, follow the instructions on the packet to activate it. Otherwise, mix the yeast in with the flour, mahlepe, and salt. Add the olive oil, sour cream, honey, and water and stir together with a wooden spoon. All of the ingredients should form a ball. Adjust flour or water to get a very slightly sticky ball (should knead easily)

Once all of the ingredients form a ball, place the ball on a work surface, such as a cutting board, and knead the dough for approximately 10 minutes. When you are done kneading the dough, place it in a bowl that has been lightly coated with oil. Form a ball out of the dough and place it into the bowl, rolling the ball of dough around in the bowl so that it has a light coat of oil on all sides. Cover the bowl with plastic wrap or a damp kitchen towel and set aside to rise until it has doubled in size, approximately 90 minutes.

When it has doubled in size, punch the dough down to release some of the trapped gases and divide it into 8 pieces. Roll each piece into a ball, cover the balls with a damp kitchen towel, and let them rest for 20 minutes. This step allows the dough to relax so that it'll be easier to shape.

While the dough is resting, preheat the oven to 400 degrees. If you have a baking stone, put it in the oven to preheat as well. If you do not have a baking stone, place a cookie sheet on the middle rack of the oven while you are preheating the oven. This will be the surface on which you bake your pitas.

After the dough has relaxed for 20 minutes, spread a light coating of flour on a work surface and place one of the balls of dough there. Sprinkle a little bit of flour on top of the dough and use a rolling pin or your hands to stretch and flatten the dough. You should be able to roll it out to between 1/8 and 1/4 inch thick. If the dough does not stretch sufficiently you can cover it with the damp towel and let it rest 5 to 10 minutes before trying again.

Open the oven and place as many pitas (probably 2 or 3) as you can fit on the hot baking surface. They should be baked through and puffy after 3 minutes.

Saturday, April 10, 2010

I've made my bed, now I'll grow in it

The end goal, I suppose, is getting rid of the last of the grass, although my husband says it creates "negative space" as well as giving the eye a rest from the relative chaos of the flower and vegetable beds. But pretty much every year I manage to sacrifice another patch of grass.

Last year I added an ornamental bed, ambitiously called the Woodland, which was supposed to be smallish trees, shrubs and an understory. But after I put it in I started realize it would cost me too much sun on the adjacent vegetable beds, so now it's more of a prairie and vegetable overflow patch.

This year, I extended the main vegetable bed, so I would have another sunny patch for tomatoes, and also to aid in crop rotation. My whole yard is only 23 x 60, with about 1/4 of it planted in veggies, maybe a total of 400 square feet of vegetables in all.

Digging through sod is a terrible way to spend a weekend, so I generally kill the grass first. For flower beds I use a thick layer of wood or bark mulch, but the wood takes too long to break down for a vegetable bed, so this year I dragged some old area rugs out of the basement (first picture, left) and put them out in the approximate shape of the bed in March, then left them there for 5 weeks. They killed the grass beautifully (pictured, below right); it took maybe 10 minutes to cut the soil into 1 foot squares, which we then simply turned over. This will compost, mostly, in the 7 or so weeks until I need to plant things in this bed. I'll just need to spade and hoe it.
No clever connection to today's recipe (maybe chocolate cookies same color as healthy dirt?), just some really delicious cookies.

Chocolate cayenne cookies
• 2 1/4 cups all-purpose flour
• 1 teaspoon baking soda
• 1 teaspoon salt
• 1/2 teaspoon cayenne

• 1 cup butter (no substitutes), softened
• 2 cups sugar
• 2 eggs
• 4 (1 ounce) squares unsweetened chocolate, melted and cooled/ or ¾ cup cocoa + 4 T butter
• 2 teaspoons vanilla extract

In a large mixing bowl, cream butter and sugar. Add eggs, one at a time, beating well after each addition. Beat in chocolate and vanilla. Combine the flour, baking soda, salt and cayenne; gradually add to the creamed mixture. Drop by tablespoonfuls 2 in. apart onto ungreased baking sheets. Bake at 375 degrees F for 10-12 minutes or until tops are cracked. Remove to wire racks to cool.

These are so delicious with milk that they really should be illegal.

Tuesday, April 6, 2010

Ghosts of gardens past

Digging out a weed-choked 4×7′ section of our garden last spring we found, not dirt, but an archeological site:
  • The remains of a 50-pound bag of rock chips from the “shrine” to a former place of business. Never use rock chips in your flower beds, because you will Never. Get. Rid. Of. Them. We ended up trying to sort them out by sifting the dirt through a lawn chair.
  • Netting from a decades-old planting of bulbs. The bulbs are long-since disintegrated or moved, but the anti-squirrel netting lives on.
  • Two bent wires that I think once propped up the “volunteer” maple tree we attempted to grow here. I put that in quotes because this tree seemed to me to be a volunteer, but it turned out that my son planted it when he was about 3 or 4. I had apparently told him that the helicopter seeds littering the lawn were maple seeds, so he took one and planted it. This charming story came to a sad end when the very weak tree toppled over one day. ( I seem to have problems with trees toppling over; we’ve had three do this.)
  • Yards and yards of green twine, which I only ever used for bean props; however, I cannot recall ever planting beans in this area.
  • Tiny yarrow sprouts. The large pink yarrow that was here was dug out, divided and transplanted at least 3 years ago, and I had no idea it was still hanging on in the weedy underbrush.
The old bed was really pretty, with a bird bath and a rock river, as well as a plaque and sculpture from my old job. This year I'll put concord grapes and blueberries here. The garden morphs on!

Are there ghosts in your garden?

Cheese Straws
From Fannie Farmer Cookbook
In keeping with the theme of ghosts, this recipe is similar to the lost cheese cracker recipe that my mother used to make.

1/4 pound butter
2 cups flour
1/4 teaspoon cayenne pepper
1 pound sharp Cheddar cheese, grated
1 egg yolk, well beaten
water if needed
salt to taste

Preheat the oven to 400 degrees. Cream the butter and egg yolk until light; add the flour, cayenne, cheese, and salt. If needed add enough water to make dough cohesive. Form dough into a ball, then flatten and roll out to 1/8" to 1/4” deep on a floured board or pastry cloth. (Thinner will give you crispier crackers.) Cut into strips 5-inches long and 1/4-inch wide. Place on a greased cookie sheet and bake 6 minutes until golden.

Notes from my friend Patte, who found this recipe for me:
Sometimes this dough needs some water to bind it together. I have also seen recipes that use 1 egg yolk in the dough. I prefer to use parchment paper instead of greasing the cookie sheet. I also make my straws shorter than 5 inches because they have a tendency to break when they’re longer than 3 (or so) inches. Bake them until they’re brown (but not burnt). Depending upon your oven, this may take longer than 6 minutes. Cool them and store them in an airtight container. This assumes that there are enough to store. If you’re making them when others are around, they will be consumed as soon as they are cool enough to handle!! Warning: Addictive.

Monday, April 5, 2010

The apple tree


My son's oldest friend used to live down the block from us. About 15 years ago, they asked us if we wanted a crab apple volunteer that had popped up in their yard.

It was about 2-3 feet tall, so we dug it up and transplanted it. For years it didn't do much-- no blossoms, no fruit, although it grew beautifully. Then several years ago it blossomed for the first time, and the following year started producing fruit. Just a handful at first, but then more and more, until last year we ended up with several bushels. And not crab apples, but rather full baby-fist sized actual apples.

We started researching apple trees to see if we could get it to produce usable fruit, and to find out what variety we had.

Of course, it's not any kind of variety at all. It's a volunteer, so by definition it's wild. And there are no "wild" apples. All commercially grown fruits, including heirloom and organically grown varieties, are grown from grafted root stock; essentially all apple trees are clones, with an entire orchard producing identical fruit. There are experimental orchards that grow trees from seed, in the hope of developing a new commercially viable fruit, but all commercial growers, and the ones you buy for your backyard, use standard varieties, and just keep rooting/grafting the trees to get new trees.

This is one of the reasons that it's such a tragedy to lose heirloom varieties in apples. Once it's gone, it's gone. You can't just plant an apple seed and hope to get a Gala apple. You might; but more likely you'll get something entirely new and not necessarily edible.

Our apple tree grew from a seed. Possibly dropped by someone eating an apple in the backyard; perhaps by some critter, um, dropping a seed on its way through the garden. The apples we get are small and very tart, but edible. I thought I might be able to try making my own vinegar; unfortunately to get usable apples you really have to treat the tree, both to get rid of the many pests that apple trees attract, and to discourage fungus, a very common problem (our tree has some sort of fungal disease, in fact). Last year I used the apples to make a border to one of my vegetable beds, and then in the fall dug the apples into the dirt to compost.

I feel a foolish pride in my wild volunteer apple tree, despite the fact that I had nothing to do with its birth, other than transplanting it to a sunny spot. Maybe this year I'll try to save some seeds, and see if I can start another wild baby.

Apple Bread
more or less from foodgeeks.com

1 cup oil (I used hazelnut, but any nut oil, corn oil, safflower, or canola will work)
3 eggs
1 1/2 cups sugar
1 tsp. vanilla
2 T. whisky, rum, or liqueur

3 cups apples, diced
3 cups all-purpose flour
1 tsp. cinnamon
1 T. orange zest
1 tsp. baking soda
1 tsp. salt
1 cup chopped nuts or raisins (optional)

In a large mixing bowl, combine and set aside the oil, eggs, sugar, liquor and vanilla. Sift flour, cinnamon, soda, and salt in a separate bowl. Add dry ingredients to the oil mixture gradually. Add apples and nuts/raisins, if any. Batter is very thick, because the apples will add a lot of moisture during baking. Bake in 2 regular loaf pans for 1-1/2 hours at 300°F. Cool 10 minutes in the pan.

Saturday, April 3, 2010

In which we welcome the god and the goddess

Grow Project April post

Having been extremely kind to the Midwest all year, the goddess continues her gentle journey into the spring with a string of 80F/26C days. The goddess’ consort, in the form of a large robin again, watched me work, mostly brute labor building beds, setting paths and amending soil. I gave the goddess a pincushion plant for an offering this year.
The weather rarely works out so perfectly for planting, or coincides so neatly with my schedule. Friday a hot sunny day for all the grunt work and some early transplanting. Saturday a gentle cool rain (still in the 50s). Supposed to be dry and warm (60s-70s/10-15) again next two days, plus, the moon phase is exactly right for putting in my early spring root vegetables. I’ll savor it, because this confluence of need and ability is so rare.
My offering to the goddess yesterday was apparently appreciated.

Among the many gardening tasks for the weekend was planting out the indoor starts of the "Spitfire" Nasturtium for the GROW project. Five seedlings went into the ground by the cyclone fence, behind the birdbath, strawberries, and columbine. This should give me color there when the columbine fades, and incidentally help draw the aphids away from the eggplants going in a little ways down the fence. I'll be cloching these early set-outs under pop-bottle cloches to protect them from the cold, since I put them out a little early (I'm not having great luck with the indoor starts; the cold can't possibly be any worse for them than my incompetence.)
I'm growing Nasturtium "Spitfire" for the GROW project. Thanks, to Renee's Garden for the seeds. I planted 6 seeds in Ferry-Morse organic seed starting medium on March 8, and got 5 seedlings. There are also 9 seeds planted in a wintersown container, in plain soil mixed with perlite. These just poked their heads out of the dirt today.
And, because it's Easter, and I hate to put up a post without a recipe:
Greek Easter Twists
(Koulourakia)

1/3 cup butter, softened
1/2 cup sugar
2 eggs
1 tsp vanilla
1/3 cup milk (or a little more if needed)
3-4 cups cake flour
2 tsp. baking powder

Cream sugar, butter and vanilla thoroughly. Add 1 egg at a time, beating well after each addition. Add milk and flour alternatiely, beating vigorously until well blended. I like using cake flour rather than all-purpose flour for these cookies; it makes a nicer texture when done. Use your judgment about the last cup of flour to make sure the dough is not too dry. You may need to work the dough with your hands at the end as it will be quite dense and springy. (If you have a food processor, these mix really well in a food processor.)

Break the dough off in small portions, rolling it on a cutting board until you have a roll about the width of your finger and 6-8" long. Form into traditional shape- a circle with the ends pressed together, or a twisted "braid." Beat an egg and coat each cookie (I use my fingers rather than a pastry brush). Bake them plain, or sprinkle with sesame seeds first.

Bake on a greased cookie sheet at 400F/200C for 20 minutes, turning once to ensure even cooking. Makes about 28 cookies.

Friday, April 2, 2010

A good enough cook

I call this blog " a common sense cooking blog, for regular people." I started it when my kids moved out, so that they could get the family recipes, and then discovered that I was enjoying figuring out these recipes, so even after I'd managed to post pretty much all of them, I kept going.

Like my garden, I don't really know anything about cooking, despite being, I think, quite a good cook. My baking is a little hit-or-miss still, but I can learn that.

And that's the point.

How good do you have to be to make your own homemade meals for your family?

It's the same thing that struck me when I started participating in gardening communities on line. People seemed to know so much- which plants need acid and which need base (as opposed to my method, which was--that plant didn't do so well with the peat, maybe I'll try bone meal.) How much sun they got. The scientific name, the genus, the family. I'd been growing tomatoes, peppers and eggplants for 15 years before I ever heard the term "solanum." And yet, somehow, I managed to grow tomatoes, peppers and eggplants just fine. Still a little hazy on which ones are the "brassicas" but I figured out the "cucurbits" right away, once I'd learned the word.

I don't know how to make a roux. I can't chop vegetables super fast. I apparently committed a terrible sin by drying my herbs in the microwave (I guess the heat destroys the enzymes, but won't the heat from cooking do that too?) for which I was publicly admonished by some locavore guru (offers sheepish grin, goes right back to microwave drying herbs, because it's fast and space-saving).

I can make a mean veggie lasagna, and tomato sauce from scratch. My chicken soup is to die for and I roll my own dolmades. And yet, one of the favorite dishes that my kids absolutely love is just noodles with butter and cheese. And that's good enough.

Everybody's favorite noodles
Any kind of noodle--spaghetti, pasta, egg, rotini, etc.
3-4 tablespoons of butter
"sprinkle cheese" i.e. grated Parmesan or Romano

Cook the noodles according to package directions; drain, but leave them in the pot. Melt the butter, allowing it to brown very slightly. Add grated cheese to taste, plus salt and pepper. And that's it. You can add a green like broccoli or spinach, but mostly we ate it as is with some peas on the side.

If you want it to be a little more politically correct, do this with your own spaetzel.